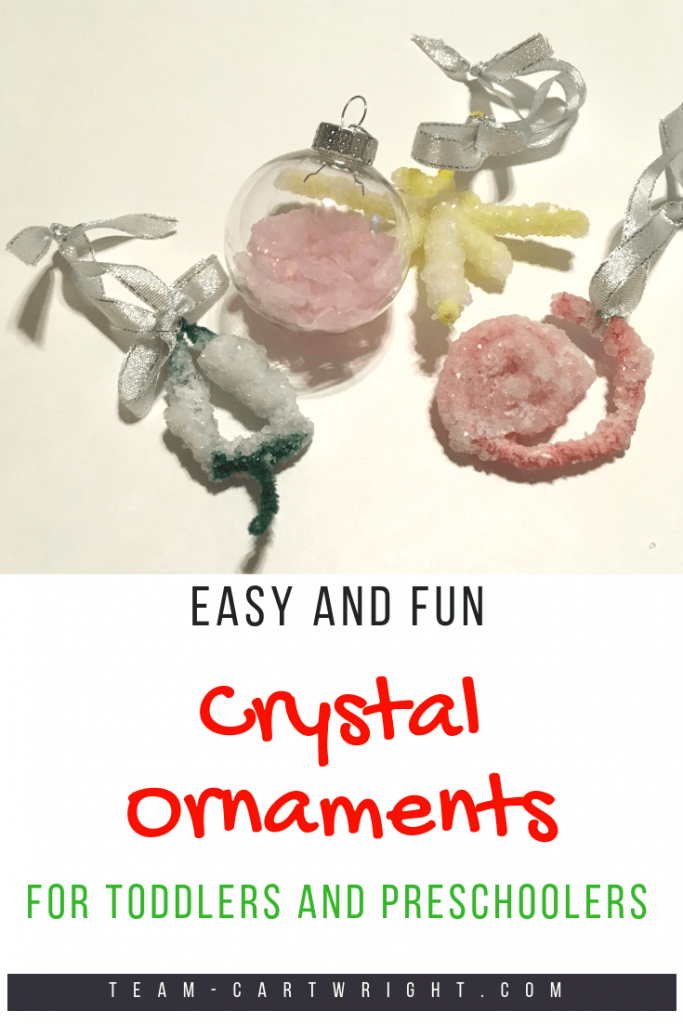
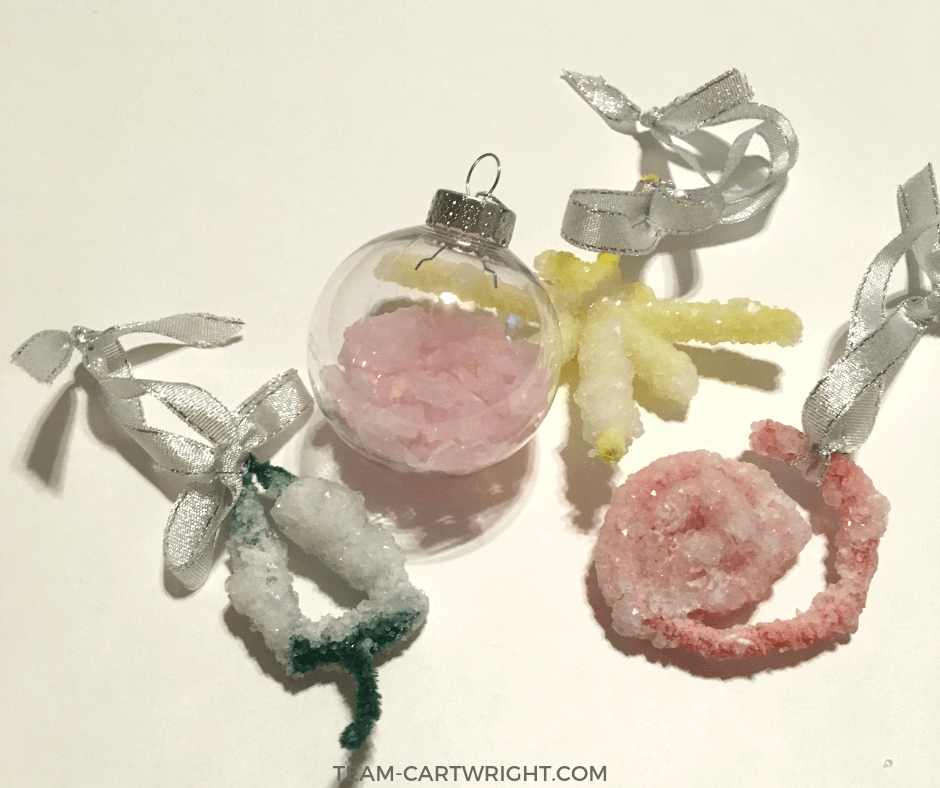
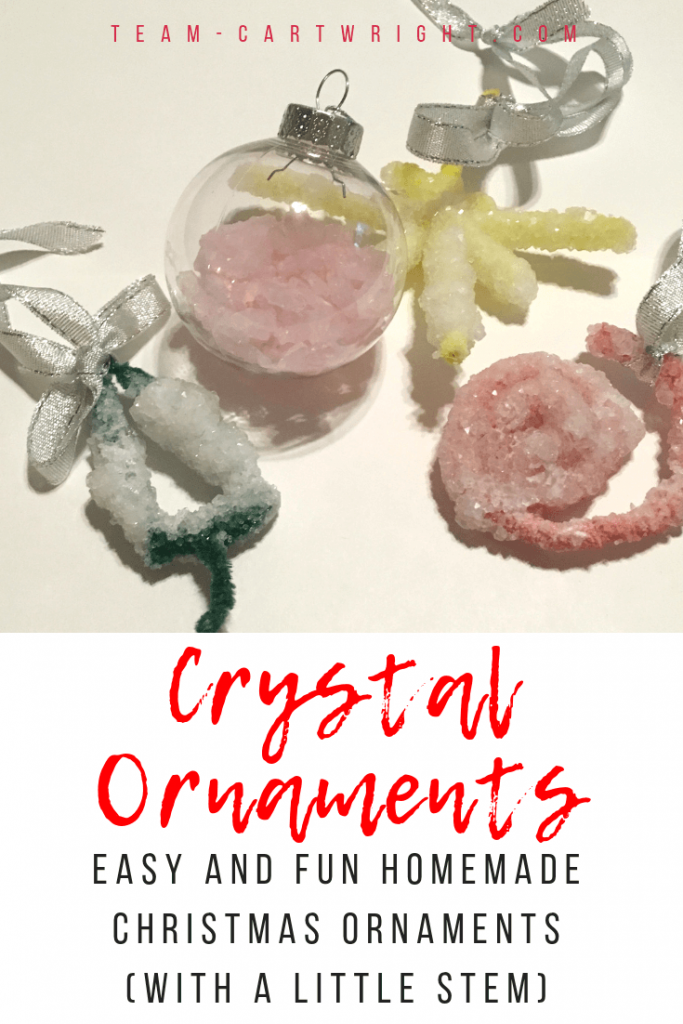
Homemade crystal ornaments: Christmas science for kids!
Homemade ornaments are a great Christmas arts and crafts activity. It’s holiday fun, they make great gifts, and you get a cute decoration out of it. I personally love looking back at the ornaments I made as a kid and can’t wait to do the same with my own kids.
The one thing that can make them better? You guessed, science. Oh yes, we are going to make some ornaments and learn about crystals. (I know, my kids are so lucky.;) )
Here is how to make homemade crystal ornaments.
What's In This Post?
Homemade Crystal Ornaments
Making these ornaments is actually pretty easy. They do need to sit overnight while the crystals form, but actual active work time is low. That makes them great for short attention spans.
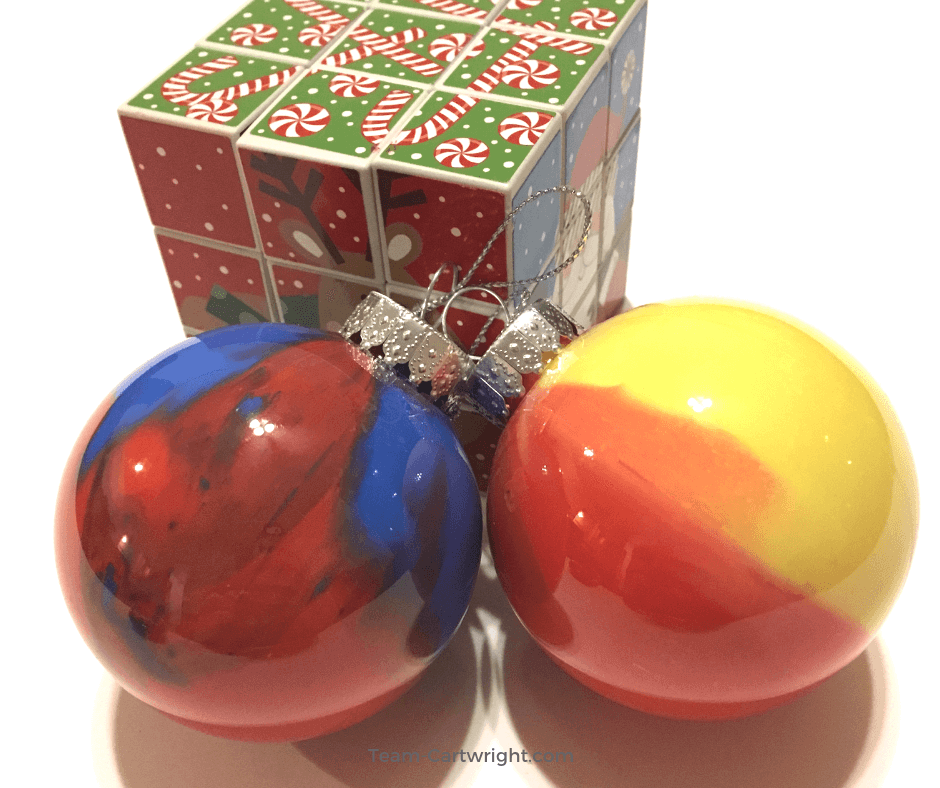
(But if you need something even faster, try these easy marbled ornaments—> Homemade Color Mixing Marbled Ornaments)
You Need:
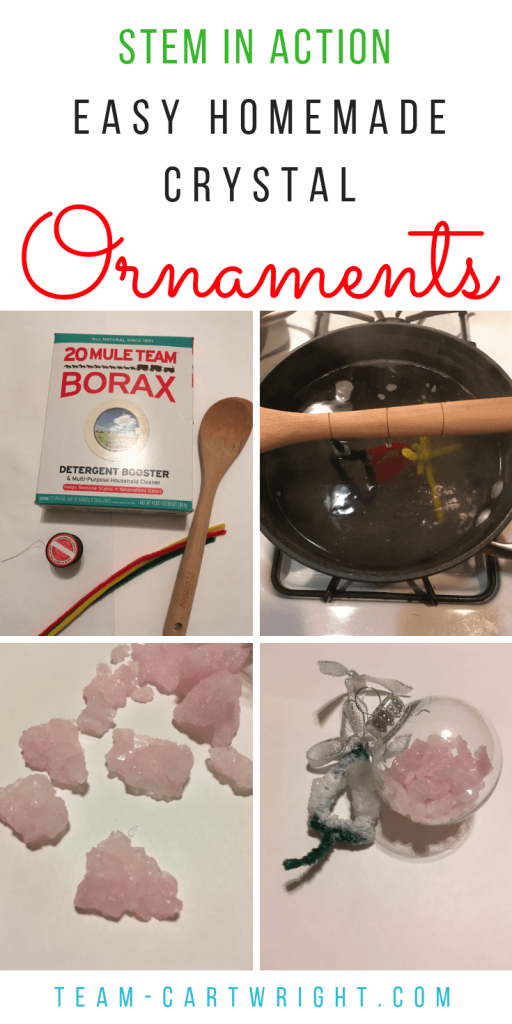
- Borax
- Water
- Pot
- Pipe Cleaners
- String
- Wooden Spoon or Ruler
- Food Coloring (optional)
To Make:
Shape Your Ornament
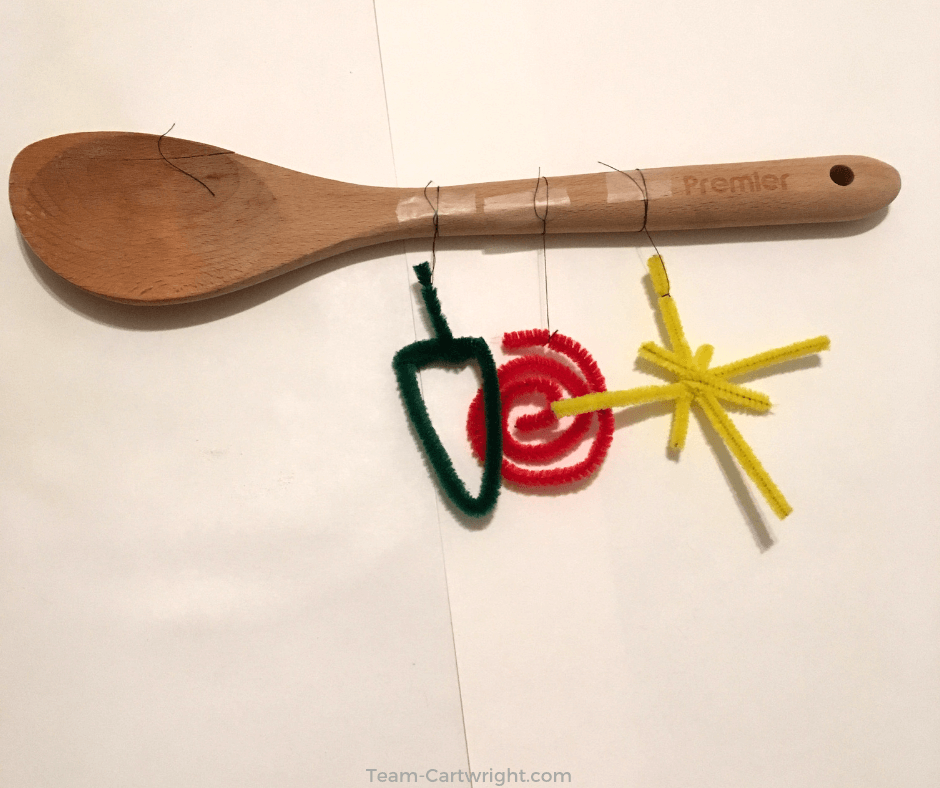
Before you start you need to shape your ornaments. Take a pipe cleaner and create the shape of your choice! We made a Christmas tree, a star, and a spiral.
Compact shapes work best, and they shouldn’t be too big. Freeform shapes look great. Or you could try a snowman. I’m going to try that one next.
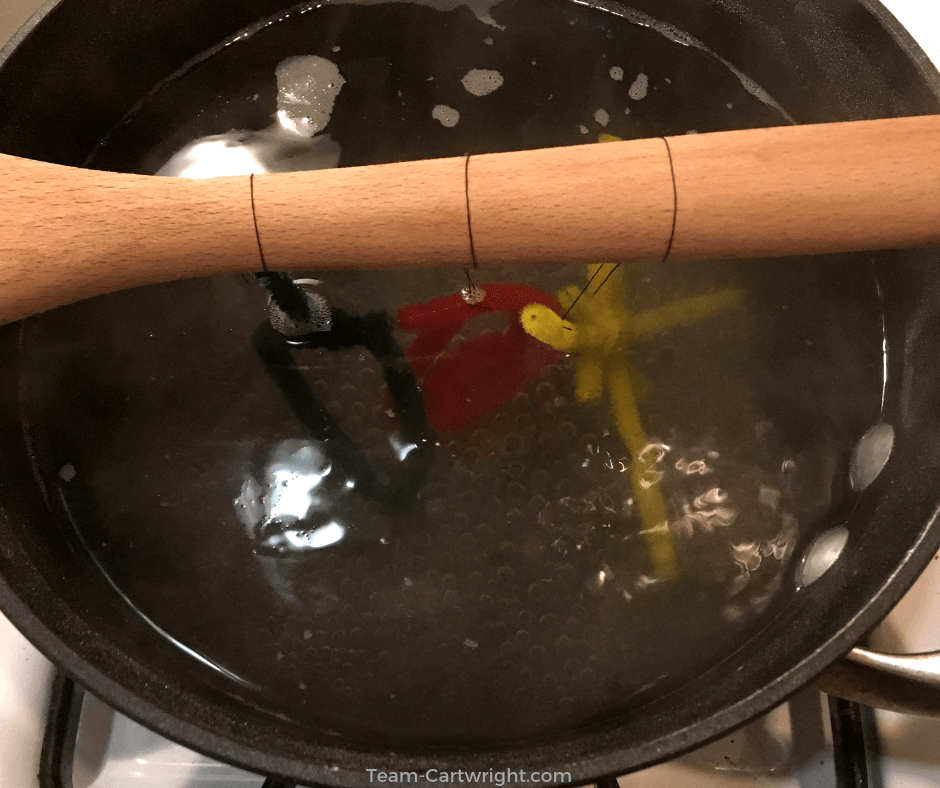
Use the string to tie your shape to the wooden spoon or ruler. This is what you will lay across the top of your pot while your crystals grow.
You don’t want your shapes touching the bottom of the pot. So make sure the string is short enough to prevent that and that your shapes are small enough to fit in the pot without touch the bottom, sides, or other shapes. (Hint: If you want to make bigger shapes you can use a mason jar or tall glass.)
Make Your Crystals
This part needs adult help or just an adult to do it, depending on the age of your children. It involves boiling water, so safety first on all accounts.
Boil water in a pot. You are going to add Borax, stir to dissolve, then add more. Then add more, and more. Yep, you add a lot. The goal is to reach the point where no more Borax will dissolve into the water. (A small amount will be at the bottom of the pot.)
I do this by eye, just adding more and more Borax. But if you would like a general ratio to start with you are looking for about 3-4 tablespoons of Borax for every cup of water.
If you want to have colored crystals, add some food coloring during this time. We made clear crystals for some shapes (in the hopes they would look like ice.) But we’ve made colorful crystals too.
Once you have added so much Borax that just a bit is left at the bottom of the pan and doesn’t dissolve, you are ready to put your shapes in. Turn off the heat on the stove.
Place the spoon or ruler with your shapes tied on across the pot and leave them there overnight. If you want to use a mason jar or glass, carefully pour the solution into the jar and then place the shape over the top like you would with the pot.
Now you wait overnight!
Crystal Formation
These crystals form pretty quickly. In the morning your shapes will be covered with crystals, and so will the bottom and sides of the pot. Don’t worry, we will clean that later.
Carefully take the spoon off the pot and gently dry your crystals with a paper towel. Cut them off the spoon and cut as much of the string off as you can.
We tied a ribbon to our ornaments to hang them on the tree. And that’s it! You have your own homemade crystal ornaments.
Troubleshooting
As I said, you want to keep the shapes from touching the bottom or sides of the pot. But occasionally your crystal ornaments will get stuck to the pot. No problem.
You can use a spoon to try to wiggle the ornament out. If that doesn’t work use small amounts of warm water to dissolve the crystals that are connecting your ornament to the pot. Gently use the warm water and a spoon to wiggle the ornament free.
What about the leftover crystals?
As I said, there will be crystals on your pot after this. Don’t worry. We have a use for those too.
Empty the leftover water from your pot. Flip it over on a plate or paper towel and use a spoon or hammer to gently tap around the bottom of the pot. This will help the crystals to fall out. Save these.
I got some clear plastic ornament balls from the dollar store. (Craft stores have them too.) You can pop the top off and fill these ornaments with anything you like.
Add the crystals to your ornament! You may need to break them into smaller pieces, depending on the size of your ornament. Then pop the top back on and you are done.
Clean Up
Sometimes all the crystals do not fall out. Try to use the hammer to get all the crystals out you can. You can throw these away.
For anything else left in your pot, start with adding more water to your pot. Gently boil that water. This will dissolve your crystals.
Let the water boil a bit and then dump it. Add fresh water, boil, and repeat. The crystals will dissolve and your pot will be clean. I do recommend you boil a few more pot fulls before cooking with the pots again.
Safety
The biggest safety hazard here is actually the boiling water. This needs an adult, but know how your children can handle it.
I have made crystals with Ben starting when he was 3. He listens well when I say stand back and can handle helping me during this step. Ali and Sammy? I think they might be a bit older while I do this step.
Borax safety? Don’t let your kids inhale or eat it. Yep, that’s it. Borax got a bad rap, but it is not unsafe if you make crystals every now and then. (Or slime.) Learn more from this video: Borax safety.
I don’t recommend making these at the same time as salt or sugar crystals, because they can all look very similar. If you have made rock candy in the past make sure your children know not to eat these crystals.
Crystal Science
I’m going to give the short version here. For more detailed information, check out this post—> The Science of Crystal Making.
Basically, you are making a supersaturated solution with the boiling water. That means you are dissolving more solute into the solution than it can hold at room temperature. As the solution cools that solute falls out of solution creating an ordered molecular pattern that we recognize as crystals.
Holiday Memories
We love our crystal ornaments. They were fun and educational to make, and they look great on the tree.
A little science and some creativity and you have Christmas fun.

Here are some more fun activities to try!
The Science of Slime and the Best Homemade Recipes
Can You Clean a Penny with Ketchup?
The Real Preschool STEM Gift List You Need
Easy Christmas STEM Activities
Homemade Color Mixing Marbled Ornaments