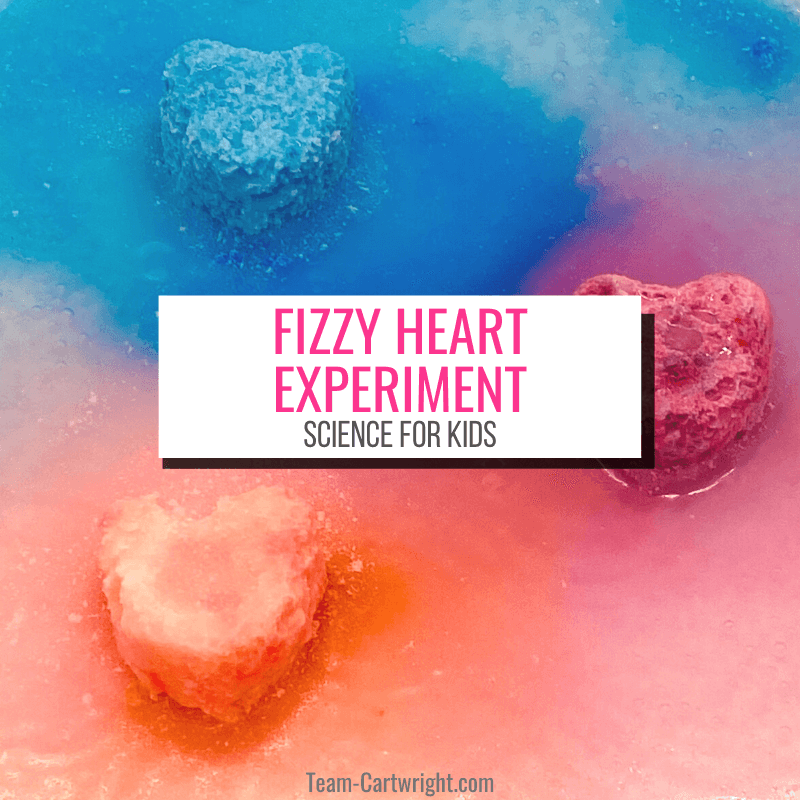
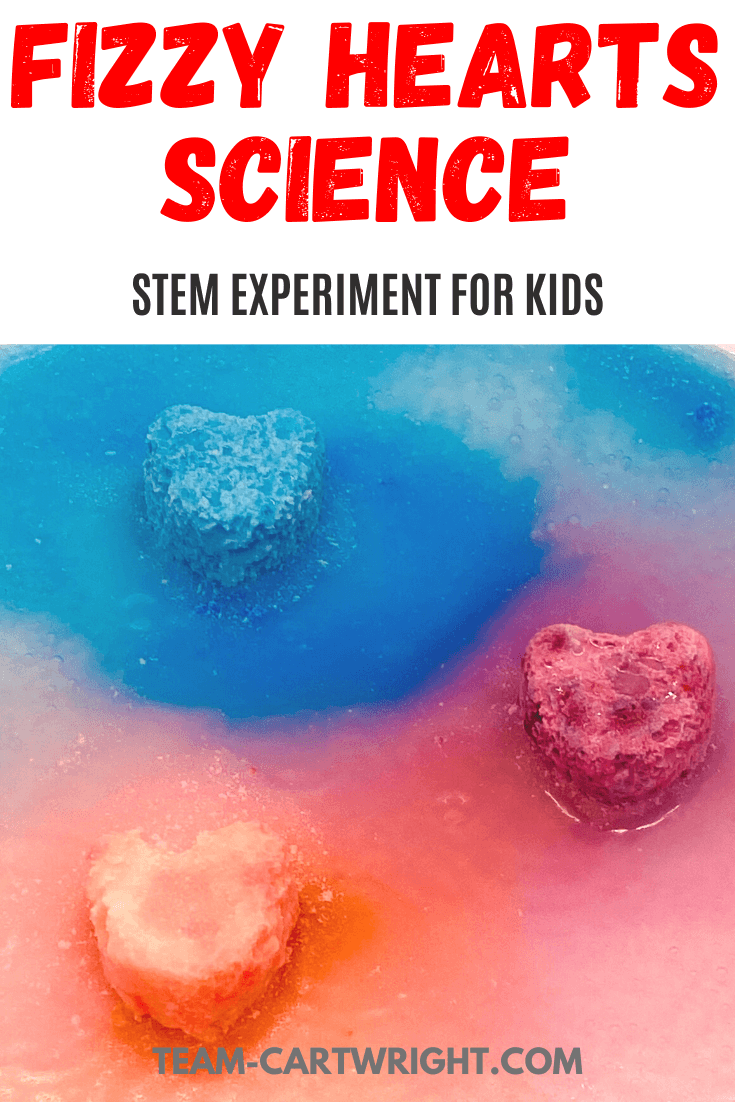
Fizzy heart science experiment for kids!
- Ages: Toddler, Preschool, PreK, Kindergarten
- Difficulty: Medium
- Learning: Sensory, STEM, Chemical Reactions
Chemistry is amazing, and there is a simple reaction you can do right in your kitchen. These fizzy hearts are cute and fun and pack in a ton of learning.
If you are looking for a fun Valentine’s Day science experiment or just a fun project for kids who love hearts and colors, this one is going to be your best bet. It is easy to put together and works every time.
You’ll also find some guided questions and learn how to lead your child through the scientific method here too. (But if you just want to play with the pretty colors, I don’t blame you. They look amazing!)
Let’s try a fizzy heart science experiment.
What's In This Post?
Fizzy Heart Science Experiment
This experiment utilized a class kitchen chemistry reaction, baking soda and vinegar. It is one that works and that kids love. And because it works so well it is a great one to guide your children through an experiment, focusing on questioning and observing.
Supplies for Fizzy Heart Science Experiment
This heart experiment is an easy one because you probably have more of the items already on hand. And they are a bit flexible, so I’ll share some notes on alterations you can make.
Here are the basics you need for the STEM activity:
- Baking Soda
- Corn Starch
- Water
- Food Coloring
- Vinegar
- Silicone Heart Molds or Cookie Cutters
- Plastic Droppers
How To Make Your Fizzy Hearts
These are not too hard to put together, you can make them with your kids! You can also make them the night before so your child can just enjoy the fun. (I prefer this, it makes the hearts a bit more mysterious and exciting.)
Step 1: Add 1 cup of baking soda to a bowl.
Step 2: Add 1/2 cup of cornstarch to the bowl and mix.
Step 3: Mix in 1 tablespoon melted coconut oil.
Step 4: Add in the food coloring of your choice. I used about 8 drops, but the exact amount doesn’t matter.
Step 5: Mix together and slowly add about 1/8 cup water. You want to end up with a clumpy mix that can be pressed together but still retains a crumbly texture. Think kinetic sand or cloud dough-like.
Step 6: Press the mixtures into your silicone molds. You want to really pack it in there, so press down hard with your fingers. If you have small molds you can use a pencil eraser to help pack it down.
If you don’t have silicone molds you can use a cookie-cutter. Place your cookie cutter on a plate with waxed paper. Press your mixture into the cutter to take that shape.
Step 7: Let your hearts set for a few hours or over night.
More Must Do Activities!
How To Experiment with your Fizzy Hearts
Once your hearts have set you are ready to experiment with them!
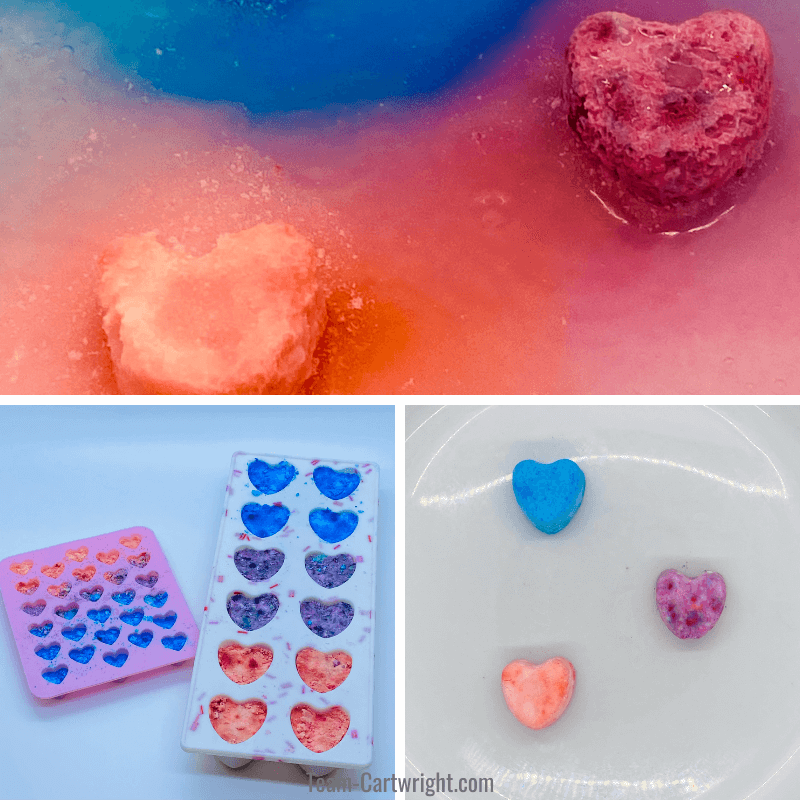
Step 1: Gently pop your hearts out of your molds or remove the cookie cutters. Place them in a plastic bin, like the one you would use for sensory activities. (You can put them on a plate, but I like to contain the next part a little more.)
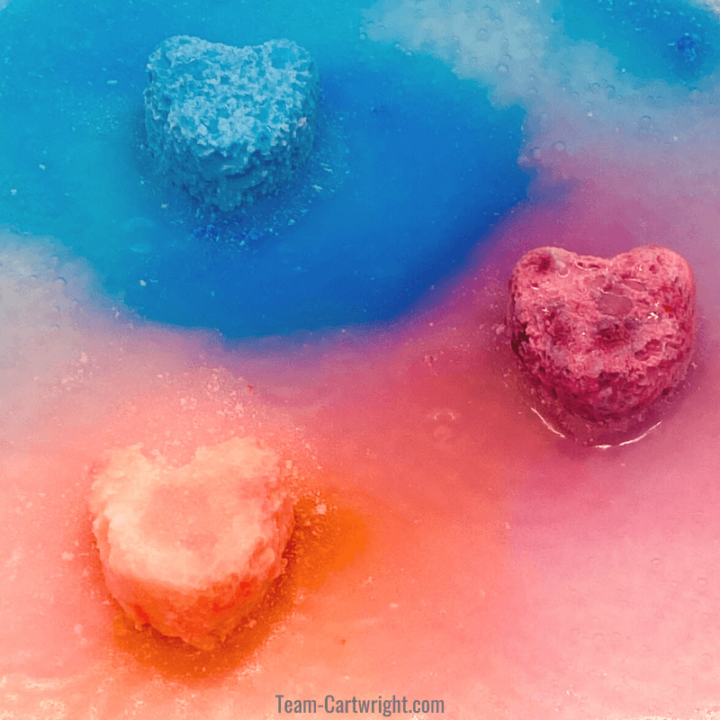
Step 2: Give your child a cup of vinegar and a plastic dropper. Then hand over the bin of hearts. Let them drop the vinegar on the hearts to see them fizz up!
Guided Questions For Scientific Discovery
As adults, we have a pretty good idea of what is going to happen in this activity. You mix baking soda and vinegar and it is going to bubble up. But children don’t always know that yet. So here are some guided questions to help them think like scientists.
- How would you describe the hearts? This boosts observation and descriptive language. Think about color, shape, size, texture, smell. Use all the senses. (Except taste. This is technically taste safe as it uses all food products, but it will not taste good.)
- How would you describe the liquid? Let them practice wafting the scent towards their noses like real scientists. Compare the solid hearts to the liquid vinegar.
- What do you think will happen when we add the liquid to the hearts? This is where they are making predictions about what will happen in their experiment.
- Describe what happened when you added the liquid to the hearts. After adding the vinegar to the hearts, take a moment to observe. What do they see? What do they smell or hear? Again, aim for as many senses as possible.
- What further experiments can you try? This is usually the point where my kids want to dump as much vinegar onto the hearts as possible. And I say go for it! You can also try using water instead of vinegar or try putting a whole heart into a cup of vinegar.
Safety
This experiment is a classic for kids in part because it is pretty safe. Everything we are using is taste safe, so if your child accidentally ingests some it is okay. (I wouldn’t encourage tasting, but you don’t have to stress over it.)
Make sure your child doesn’t inhale any of the powders you are using. Also, make sure they don’t touch their eyes while they are working with the materials.
Clean Up
This is also a pretty easy activity to clean up.
The number one tip to keep STEM activities from getting too messy is containment. So make sure your child is doing this experiment in a bin or tray that can hold all the liquid.
With enough vinegar, your hearts will completely dissolve. At that point, you can dispose of the remaining liquid down the drain.
(And learn how to create mess free sensory play time for your kids: Mess-Free Sensory Play Tips.)
The Science of Fizzy Hearts
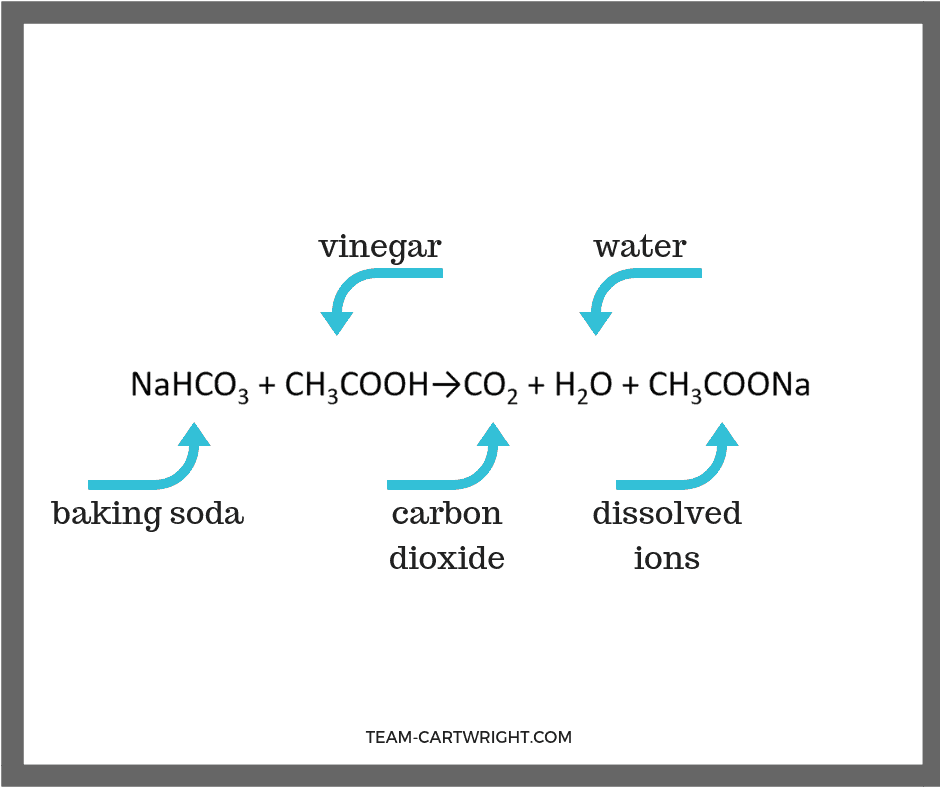
So what is going on in this reaction?
The main components causing the fizz are the baking soda and the vinegar. When vinegar and baking soda mix they form carbon dioxide and water. (And there are dissolved ions as well.) You can see the reaction here:
Tips For This Science Experiment
A few tips to help you out.
Fortunately, the measurements for this activity are pretty flexible. The cornstarch adds stability to your hearts when they are solid, so you can add more or less as you desire. The coconut oil helps with stability as well, so you can substitute other oils for this. You can even leave it out if you’d like, just be gentle with your hearts.
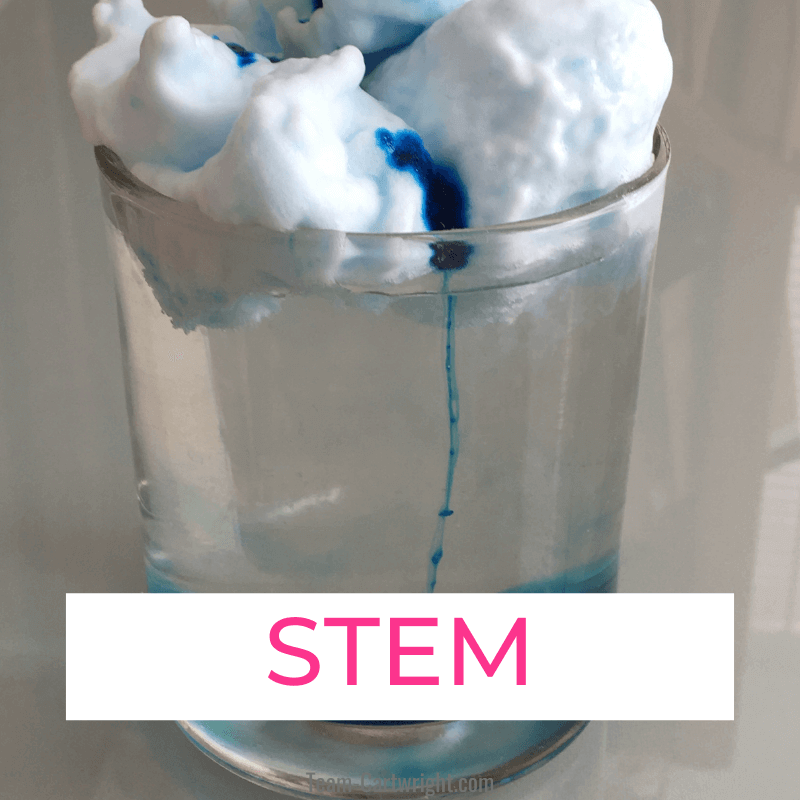
I know it is fun to get bigger and more bubbles. If you have powdered detergent you can add a little of that to your hearts. The soap traps the bubbles created by the reaction and gives a foamier result.
You can skip the food coloring if you’d like. I prefer to put it in though because it lets us play with color mixing as well. (Learn more about the science of color here: Color STEM for Kids.)
Following the Scientific Method
This activity is a great one to use while you talk through the scientific method.
- Ask a Question. For this experiment, the most obvious question is What is going to happen when we add vinegar to the hearts? What other questions do your children have?
- Observe. Have your child observe the components you will be using. What do the hearts look like? Feel like? Smell like? What about the vinegar?
- Make a Hypothesis. This is your child’s chance to make their best guess about what will happen to their hearts.
- Experiment. Time to do the experiment!
- Data Analysis. For this experiment, the main data analysis is talking about what happened in the experiment. Did the same thing happen with each heart?
- Form a Conclusion. Does mixing baking powder and vinegar result in fizzing? What sort of conclusions can your child draw for their experiment?
Now, I know a lot of people have some negative associations with the scientific method. Maybe you did not have the best high school chemistry experience, but trust me, the scientific method has real value.
Even if your child never goes into a STEM field, there are a ton of life lessons found in this exercise. You can learn more here: Life Lessons from the Scientific Method.
Fizzing Science Fun!
These fizzing hearts never get old. And they are so perfect for little scientists just starting on experiments. (Though I know as an adult scientist I love it too.) The bright colors, the bubbles, it’s just the best.
This is a must do experiment for kids.

Where would you like to find your next activity?
Fizzy Hearts Science Experiment
Celebrate love with this fun science experiment for kids! It takes a classic kitchen chemistry reaction and gives it a colorful twist. Plus learn how to take your kids through the scientific method as they perform their experiment!.
Materials
- Baking Soda
- Cornstarch
- Coconut Oil
- Water
- Food Coloring
- Vinegar
Tools
- Silicone Heart Molds
- Heart Cookie Cutter (optional)
- Plastic Droppers
- Bowls
Instructions
- Add 1 cup of baking soda to a bowl.
- Add in 1/2 cup of cornstarch and gently mix.
- Mix in 1 tablespoon melted coconut oil.
- Add in food coloring of your choice. (optional)
- Slowly mix in approximately 1/8 cup water, mixing as you go. The goal is a crumbly mixture that sticks together if you press it into a ball. It is similar to cloud dough or kinetic sand.
- Press your mixture into your silicone heart molds. If you don't have molds you can place cookie cutters on wax paper on a plate and press the mixture into those.
- Let your hearts dry overnight.
- Gently pop the hearts out of the mold and put them into a shallow dish or bin.
- Give the bin to your child with a cup of vinegar and a plastic dropper. They can add vinegar to the hearts and watch them fizz!
Notes
Safety
This is a taste-safe activity in that all the materials are food products. It does not taste good, and you should discourage tasting. But if your child tries some it is okay.
Be sure your child avoids inhaling any of the components. Keep all materials out of eyes.