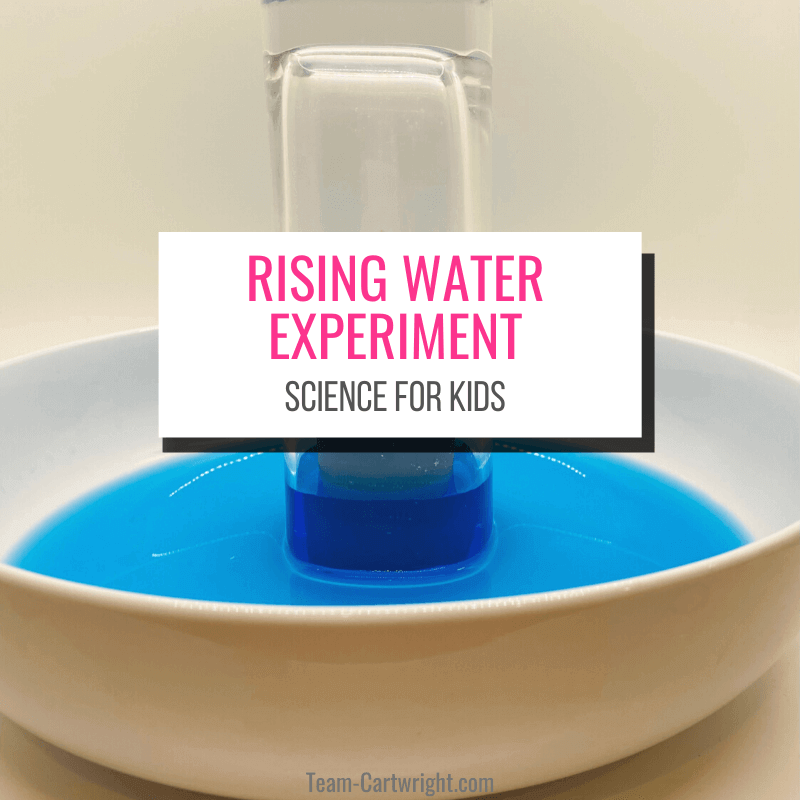
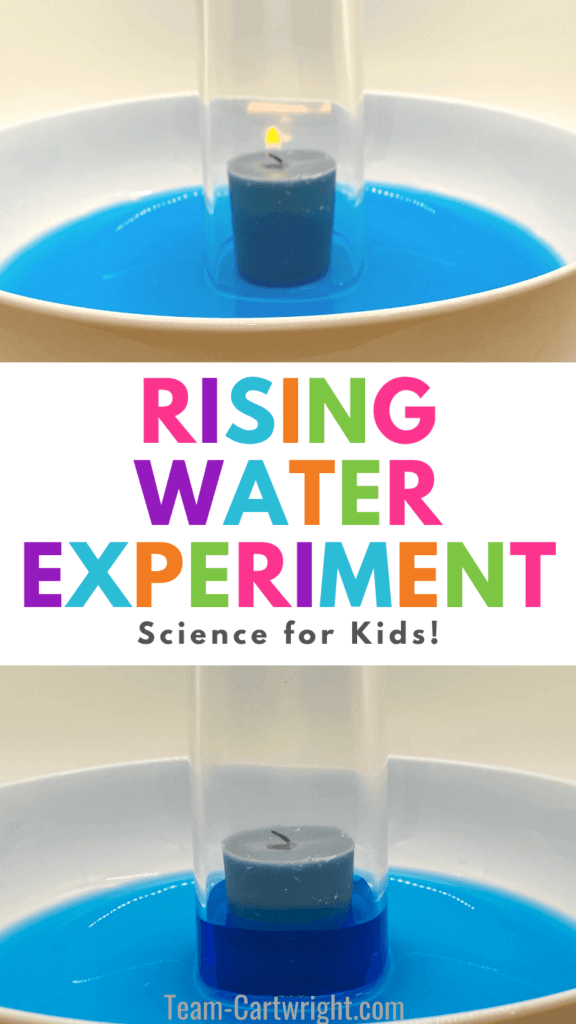
Rising Water Experiment: a magic rising water science experiment.
- Ages: Preschool, PreK, Kindergarten, Elementary
- Difficulty: Easy
- Learning: STEM, Air Pressure, Ideal Gas Law, Charles’s Law
Did you know you can make water rise without touching it?
Nope, it isn’t magic. It’s science. Surprisingly simple science in fact. This science experiment comes together in minutes, but it will captivate your children.
Here is how to do the raising water experiment, simple glass and candle STEM magic.
What's In This Post?
Rising Water Experiment
This experiment uses at-home materials and is fascinating! It does require adult help, but adults will love it too.
Supplies for your Glass and Candle Experiment
You only need a few items to make this magic water STEM experiment work. Here is what you need to gather up:
- Glass or Jar
- Small Votive Candle
- Shallow Dish
- Water
- Food Coloring (Optional)
- Matches or Lighter
How To Do the Rising Water Experiment
Before we even get started please remember that an adult needs to be present for this experiment. We are using fire, which can be dangerous, so be smart.
Step 1: Take a sallow dish and fill it with water. You want just enough to cover the bottom.
Step 2: If you want, add food coloring to the water. This just makes it easier to see and is fun, so totally optional.
Step 3: Place your small votive in the middle of the dish.
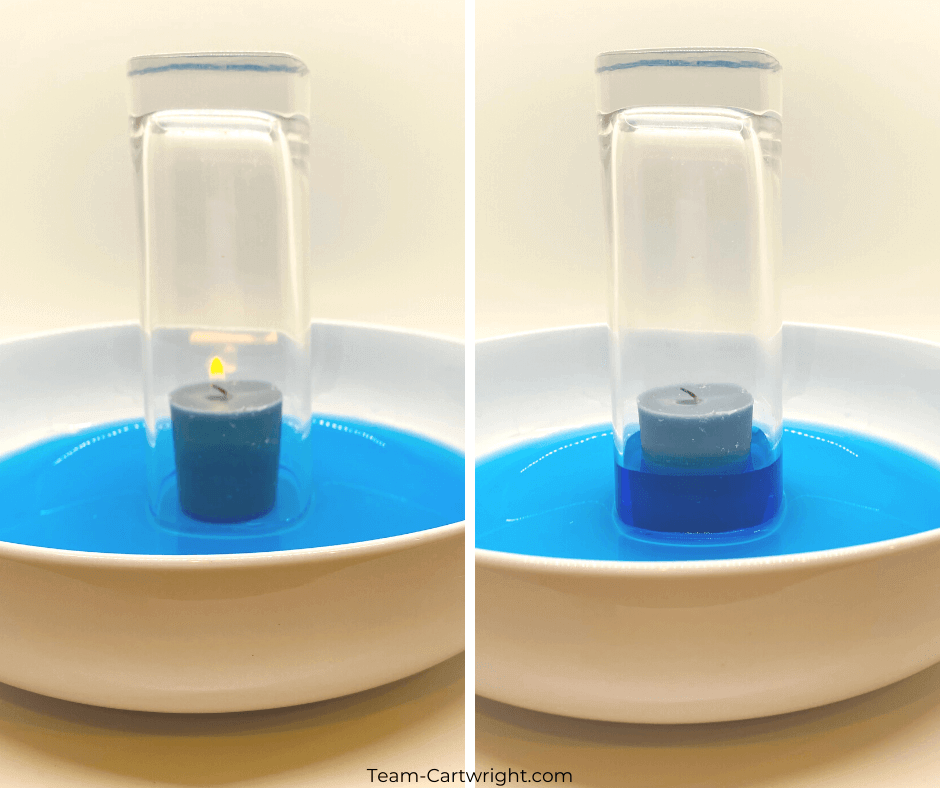
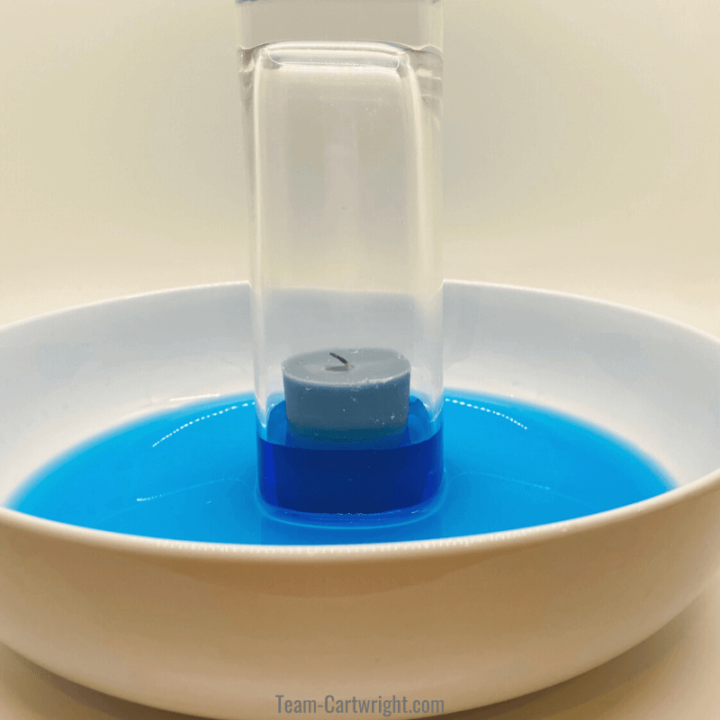
Step 4: Light the candle, then quickly place the empty glass over the flame, touching the water. Now wait while the candle burns out.
Step 5: Watch as the water rises up into the glass!
Safety
The number one safety tip here is to be careful with the flame! This experiment must be done with adult supervision at the bare minimum. With younger children, like preschoolers, this needs to be an adult-led experiment.
This STEM activity also uses glass, so it is a good idea to be careful in case it falls or breaks.
Clean Up
Clean-up for this activity is pretty simple. Slowly lift the bottle off of the candle.
Once the bottle is off, gently blow the candle out. Let the candle cool (or have an adult get it), remove it from the dish, and dump the water down the drain. That’s it!
More must do activities!
How the Rising Water Experiment Works
This is a pretty cool experiment, but it is important to talk about what actually makes this happen. It’s fun to say it is magic, but as my kids tell me, ‘It’s better. It’s science.’
The Science
There are two main components of this experiment that cause the water to rise, a physical component and a chemical component. These two components work together to make this experiment happen.
The Chemical Component
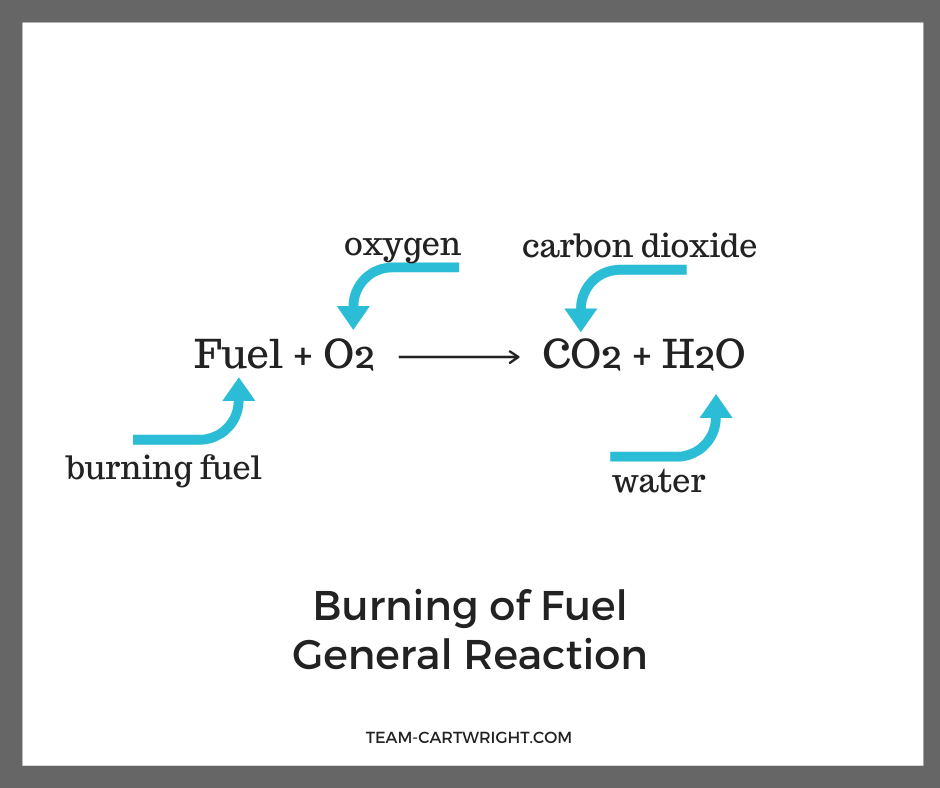
The candle burning creates a chemical reaction. The flame burns both the paraffin (candle wax) and the oxygen under the glass. This reaction uses up oxygen and creates water and carbon dioxide as a result. Twice as much oxygen is burned than carbon dioxide produced, so the volume of air in the glass decreases.
(Note the total amount of matter in the jar remains the same. Conservation of matter tells us this. But some molecules are larger than others and take up more space in terms of volume.)
The Physical Component
The physical component is why the water level in the glass doesn’t rise as soon as the candle is covered. The candle warms the air, and this increases the air volume inside the glass.
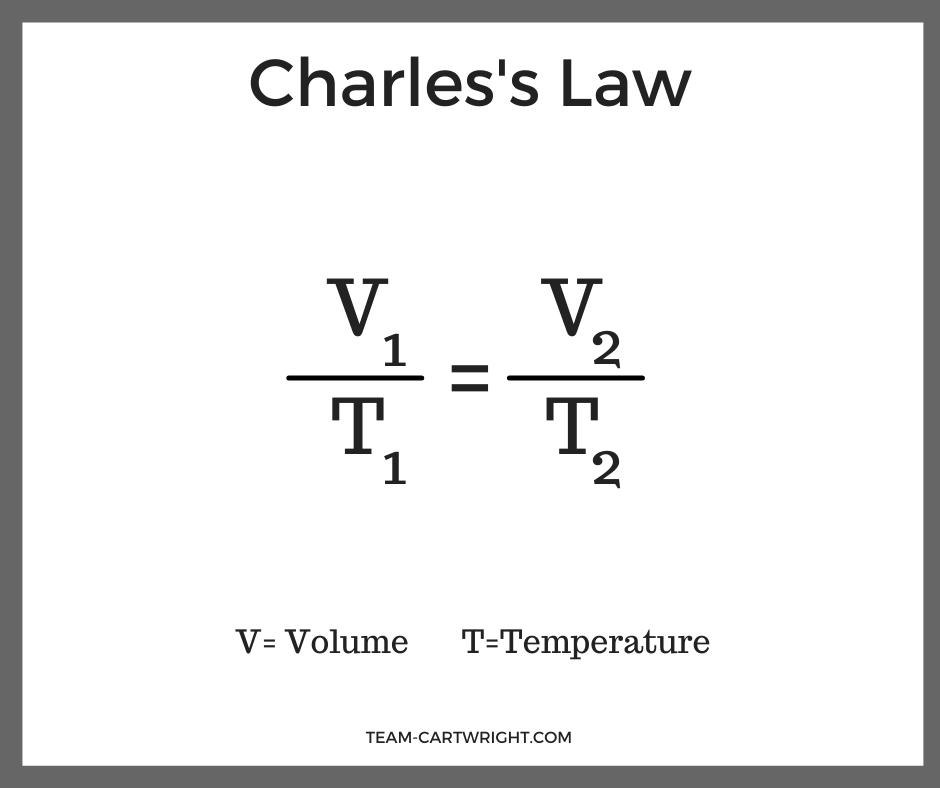
When the candle burns out (because all the oxygen is used up), the temperature cools quickly. This temperature decrease means the volume also decreases, which lets the water rise to fill up that space. This is called Charles’s Law.
Charles’s Law tells us that the ratio of volume to temperature must remain the same, so if one goes down the other goes down too.
The Big Picture
These two parts of the experiment work together. Both the volume change and temperature also affect the pressure in the system we created. When temperature decreases (the physical component) and the size of the matter decreases (the chemical component), the pressure of the gas inside the glass decreases too.
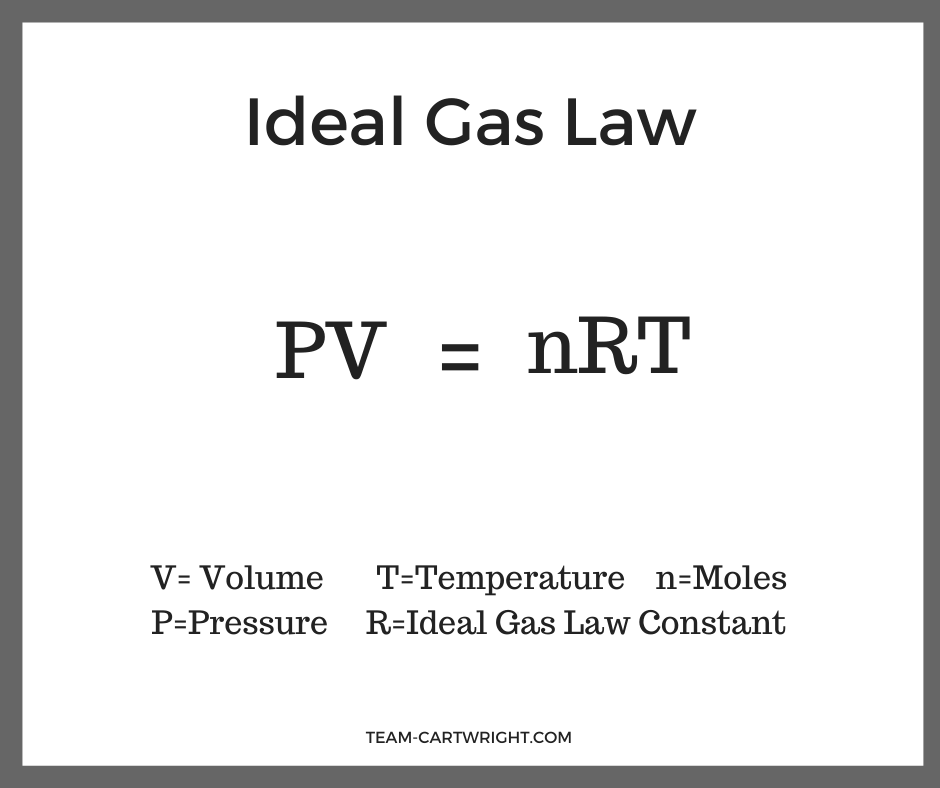
This lower pressure inside means the water can rise as well. This is explained by the Ideal Gas Law.
The idea of air pressure can be a bit challenging for young children to understand. It isn’t something they can clearly see, so that makes sense. But they can understand something changing size, in other words when volume changes.
If the air inside the glass takes up less space, it makes sense for the water to fill in that space and rise inside the glass.
What Should Children Take Away From This Science Experiment?
I understand that we went over a lot of more complicated concepts here. (And don’t worry, I’ve listed the definitions for the terms below to help out.) Am I really expecting young kids to understand and retain all this?
No. I mean, it would be cool if they did. And some might. But realistically that is not the point of this kind of science. The purpose of giving these explanations is so that you as a caregiver can quickly get the reasoning behind this project and interpret it for your children.
It is helpful for your children to see these experiments. Even if they don’t fully understand the details, this experience is adding to their understanding of how the world around them works. It builds their science base.
Using the vocabulary helps kids as well. First, it gives new words which are always helpful for communication skills. But I think, more importantly, it demystifies science later in life. Science can feel like a whole new language as we get older, and that can be very intimidating. If we have been exposed to these terms though, it’s less scary. We might not know exactly what they mean but we know that we have heard them before. This helps kids feel like science belongs to them. Because it does.
Helpful Definitions
Here are a few helpful definitions for the raising water experiment.
Conservation of Matter
The conservation of matter law states that matter is not destroyed or created. It can change forms, but the total amount stays the same.
Charles’s Law
Charles’s Law tells us that the volume of a gas is directly proportional to the temperature of the gas. As the volume decreases, the temperature decreases, for example.
Ideal Gas Law
The Ideal Gas Law describes the conditions a gas is under and how those conditions will vary as compared to each other. The pressure of the gas multiplied by the volume will always equal the number of moles multiplied by the temperature and ideal gas law constant.
The Scientific Method
Since an adult is needed to run do this experiment with kids (fire safety!), it is a great time to talk through the scientific method! Here is a guideline of what that can look like with this STEM experiment.
(And don’t forget to learn all the life lessons that come along with the scientific method here: Beyond the Science- What Kids Are Really Learning.)
Ask a Question
Ask your child, what do they think is going to happen when we put the glass on the candle? The key here is to listen and let them think it through. No answer is too far out there or wrong at this step.
Observe
The observation step is key throughout any experiment, but take a moment and look at their components. What do they notice about them? How do they normally behave? What do they already know about them?
Hypothesis
Narrow down your potential answers and decide on one or a couple of outcomes you think are most likely. This is your hypothesis.
Experiment
Time to run the experiment! Encourage your children to keep watching what is happening. (In this particular observation, sight is going to be the key thing to focus on. Some touch is possible, watching out for the flame of course. And you can encourage smell and hearing for practice.
Results
What did they observe? Now is the time for them to tell you everything they can about what just happened.
Analysis
This is where we form the conclusions and apply the information we learned. Do they think this will always happen? How did the results match or differ from their hypothesis?
Follow Up
Real experiments always lead to more questions. What does your child want to try next? What would they change in the experiment? Does more water in the dish change anything? Can they try to suck up all the water? Would adding a different liquid change the results?
Even if you aren’t able to complete any of their additional experiment ideas, it is a good idea to think of ways to explore more. Plus it is amazingly fun to hear all the ideas kids have.

Magic Water Science Experiment
This is a great experiment to do over and over. It’s fast, cheap and full of fun learning. It’s a must-do!

Let’s find your next fun activity!
Free Printable Raising Water Experiment Instructions
Raising Water Experiment
How to do the raising water experiment that will wow kids!
Materials
- Shallow Dish
- Water
- Glass
- Votive
- Food Coloring (optional)
Tools
- Lighter or Matches
Instructions
- Fill your shallow dish with enough water to cover the bottom. Add food coloring. (optional)
- Place your votive in the middle of the dish.
- Light the votive candle.
- Place the glass upside down over the candle.
- Wait for the candle to burn out and watch the water rise!
Notes
Safety
This is a science experiment that needs adult supervision and help. It uses fire and needs an adult to be safe.
Clean Up
To clean up, gently pull the glass off the candle. Make sure the candle cools and the water can go down the drain.